tech tuesday
Students and Teachers as Makers: Apps to Present and Share Lessons and Learnings (Part 2)
In Part I of this post, I introduce the web-based application Present.me as a potential tool for you and your students to create video presentations, tutorials, and lessons.
Two additional tools my students and I enjoy are ScreenChomp and Screen-cast-omatic.
ScreenChomp (available in iTunes) is-in essence- a white board that you can record. Teachers utilize ScreenChomp to record their drawings, diagrams, or text on a whiteboard or customizable background with audio explanation and guidance. You can pause the video, insert photos and PDFs, change the background, erase, and then publish as a link or save to your account to share with students. Want to be really efficient with your time? Connect your iPad to a project with AirPlay mirroring through an Apple TV or a VGA adapter so you can record the demonstration or lesson while you are teaching face-to-face. Then, post the link of the ScreenChomp for students to review.
Check out the developer Tech Smith’s website for an overview of features.
Ideas for students:
- Demonstrate a process with a “think-aloud” like solving a math problem or conjugating a certain type of verb in a language class.
- Respond to a picture or prompt by annotating and talking about their responses.
- Crate a video lesson for their classmates on a focused topic or skill like mitosis vs. meiosis or allusions in literature.
 Screen-cast-o-matic is a free web-based tool you can use to screen capture your desktop on a PC or Mac. Click on the screen recorder button on the website and a dotted-line box appears that you can re-size to create a record window on your screen. This is my go-to tool to create quick tutorials for technology topics ranging from citing sources in databases to creating a Google Doc. The free version does limit the recording time, but in general tutorials are under five minutes, so I haven’t had a problem there.
Students and Teachers as Makers: Apps to Present and Share Lessons and Learnings (Part I)
Thinking about “flipping” your classroom? Looking for tools your students can use to demonstrate their learning? I’ve become a fan of three simple (and free) apps that you and your students can easily use to record and share tutorials, lessons, and demonstrations.
Present.me
For those of you who miss the face-to-face quality of in-class tutorials and instruction, this website might be just what you are looking for to create and share tutorials or presentations with your students while maintaining that human and personal aspect. Present.me allows you to create presentations with slides and video, slides and audio, or just video. Upload your existing presentations, PDFs, or pictures and then record a video where you explain or teach in a split screen. Feeling a little camera shy? It’s just as easy to record audio alongside the slides as video.
Check out the fractured fairy tale book talk for my example and Present.me’s own list of simple tutorials.
The free version allows you to upload content and record video, audio, or video-only. You cannot download the video and save as a file with the free account, but you can embed the video in a web page or share through social media sites and the direct link.
A few things I learned while making my own Present.me:
- Write your content first if starting from scratch–If you have an existing lesson or PPT, then it should be relatively quick to create your own explanation or to record the lesson you are accustomed to. If starting from scratch, I definitely recommend writing a script, first. The better Present.Me videos do have more of an “off-the-cuff” feeling. I wasn’t quite there with my first attempt, so I split my screen and had a script up that I read from while clicking through the slides.
- Practice your timing before you record–I think I took something like 8 recordings before I got to the final version. Many of the deleted versions were due to clumsy fingers. When you record video or audio alongside slides, you have to click to advance the slides while you record…takes a couple of practice rounds to get used to, but then it’s a synch.
- If you video, use a high(er) quality camera–I went with the built-in camera on my iMac, but will try using my webcam next time. I wasn’t too happy with how pixelated the video came out, and there was a slight delay in motion with the audio. But, that’s a nit-picky thing.
Ideas for students:
- “Me-Presentation”–this platform lends itself well to a little bio about yourself or even an alternative to the paper resume.
- Explanatory/ Process–Students could create a presentation aimed at explaining a process or concept that utilizes examples or diagrams.
- Digital Storytelling–What if students narrated their own stories alongside a visual storytelling technique? We’ve been using MovieMaker, iMovie, and Animoto for digital storytelling, but those tools eliminate a lot of the power of students’ own voices when telling the story. Why not allow them to tell the story alongside the story for a dynamic narrative experience?
Tech Tuesday RETURNS: Writing the Web One Image at a Time
As we continue to make the evolution from Web 2.0 to Web 3.0, I am astounded by the number of excellent creativity tools available for learners. Web 2.0, which ushered the era of content-creation, social media, and production (Google, YouTube, etc.) , following the dot-com crash in 2001, brought with it tremendous tools for learning. Now we’re beginning to see the impact Web 3.0, which empowers users to re-create, mix, transform, and produce new forms of information (Mozilla, Tagxedo, etc.).
Students now have the ability not to just be consumers of the web, but to be producers. There are numerous sites and applications that invite students to collect web parts, information, graphics, and media and mix them together to create a new interpretation of that topic or idea (Glogster, Videolicious, etc.)
Today I’d like to share a site that is rather new to me but that is simple to use and grasp for students and teachers: Thinglink.com
A Thinglink is a visual representation of a topic that embeds pictures, graphics, sound, text, and links. A creator chooses an image as the background and then can link in web content, providing a digitally engaging and unique experience.
It’s quick and easy to register and create an account with the opportunity to link your Facebook or Twitter account for set up. Then, you begin by importing a picture from your hardrive, choosing from your Facebook albums, browsing Flickr’s public photo gallery, or providing a web address for photo.
You are able to share your creation through Google+, Edmodo, Facebook, Twitter, and many other social platforms or by the link, like here (Thinglink for the book Code Name Verity by Elizabeth Wein).
Thinglink is also available as a gadget for blog services. Check out the gadget on my blog on the upper-left hand corner!
Infographics: Going Digital with Data
Tech Tuesday: Students as Information Consumers and Creators
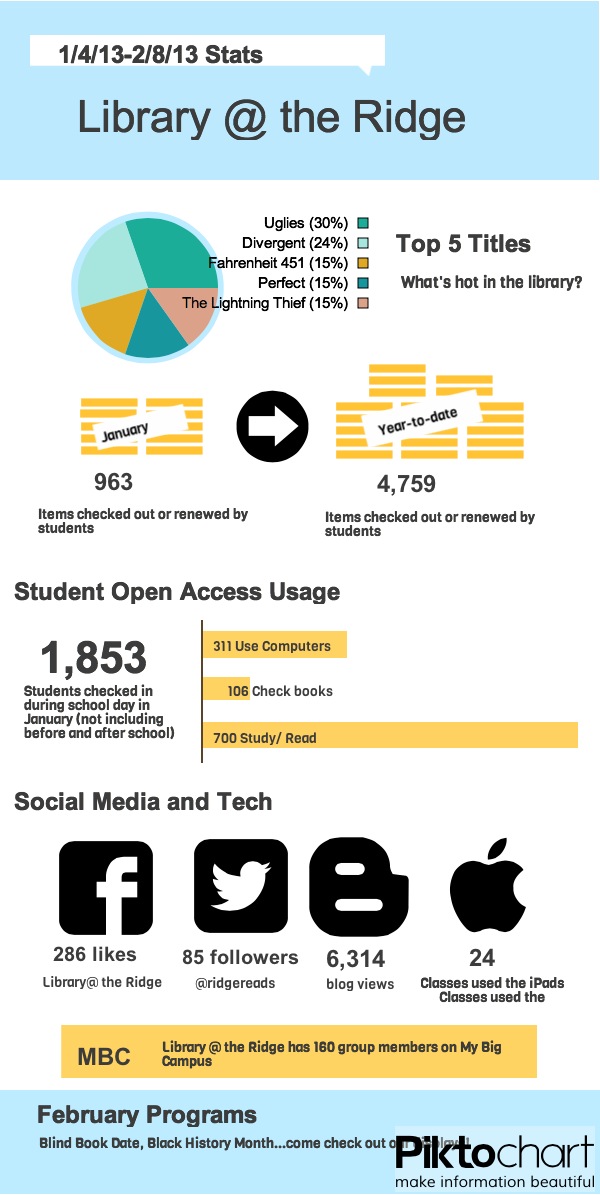
Our students are bombarded with information 24/7/365. They forget (never learned) how to be curious and critical consumers. An inquiry stance to learning taps into our natural curiosities, building upon content area knowledge in relevant and authentic ways. A simple infographic (informational graphic) might make more of a lasting impression upon a student and his learning experience than a five page research paper or report.
 |
| Created at http://www.piktochart.com to publish the library’s statistics for January |
American Association of School Librarians (AASL) NETS-S
The "True" Wave of Digital Natives
Today in a session with Project Tomorrow’s CEO, Julie Evans, we were treated with a sneak peak at some of the data trends from the last Speak Up survey administered this past December (2012).

Now, data and I have had a rocky, tumultuous relationship. In my early teaching years, data and I weren’t too familiar with one another–passing ships in the night. As a graduate student, I started to flirt with data a little bit once I caught a glimpse of what he could do for me and some of the practices I was researching in my classroom. But, we hit a major roadblock in our relationship the year that data was wielded like a thick, leather belt, snapping and cracking down the hallway, forcing data-driven instruction down our throats, angrily pushing us towards practices that did not align with our beliefs and better intuition. Data and I broke up that year, and I admit I talked trash about data behind his back.
There was no magic moment when data came back into my life and the past was erased. It took a lot of coaching and mentoring from leaders, friends, and mentors who had healthy, constructive relationships with data. Today, we’re cohabitants of the same house, focused on the improvement of learning for everyone on our campus; we relate easily, flexibly, and without judgment.
So, today when Julie announced she was giving us a preview of the yet-to-be released data, my nerdy heart skipped a beat. Our campus participated in the Speak Up survey–a difficult task in a campus of 2200 students. Individual campus and district results will be made available tomorrow, 2/6. I appreciate having the national trends to compare our local results to and anticipate that we’ll fall in line with those trends.
Three Key Trends for Educational Technology
1) Students want devices that allow them to personalize the educational process, the same way that they personalize their social media and web presence. They want devices that help them be more productive and allow them to CREATE and ADAPT.
2) We’re at a BYOD/BYOT tipping point. The stage is set for integrating personal devices into learning. Administration has turned a corner with its willingness to allow personal devices, teachers are curious, and students are willing and able. How can we take advantage of the growing momentum and be thoughtful, reflective and strategic in our visions and action plans?
3) The “true” digital natives haven’t even arrived yet on our high school campuses. According to the findings of Speak Up’s yearly survey assessing the rolling of technology in learning, a shift has occurred in the readiness, access, and skills our 9-12th graders bring to the digital table and their middle school counterparts. They are coming to us very soon; how will we prepare for tomorrow’s learners?
Wow! I’m excited. I’m ready. I’m curious.
Now what?
by
Student Collaboration with Google Drive
1) One person does all the work. The high-achiever of the group grins and bears it as they carry the weight of the project.
From the other side of our various devices and locations strewn across the metroplex, we all shared a collective sigh and appreciation for the power of collaborative writing and tools such as Google Drive that breathe life and spirit in to the writing process.
So here’s the skinny on Google Drive:
1) It’s free. Doesn’t get any better than that.

Applications for learning:
Can we still have the same learning goals for students and their writing if they are participating in a collaborative essay or project that we would an individual assignment? YES! Do we address more learning goals by having them use technology to work collaboratively on a writing task? YES!
ISTE’s NETs for Students even address this skill as relevant and integral to today’s workforce and post-secondary environments:
| 2. | Communication and Collaboration | ||||||||
| Students use digital media and environments to communicate and work collaboratively, including at a distance, to support individual learning and contribute to the learning of others. Students: | |||||||||
|
Coming soon! My Big Campus allows you to integrate Google Drive as an application, much like it does Facebook and Twitter, which means that students can collaborate on Google Docs and more through one portal: MBC!
What is your personal experience with using Google Drive? Do you see any advantages for using it with students? Are there pitfalls or obstacles to integrating Google Drive into your learning activities?
On the Path to Technology Integration…We Need a Map
Great things are happening here at The Ridge! I’ve always believed that the leadership, innovation, and vision of individuals on this campus have the potential to make us leaders in education, especially in regards to raising student engagement and closing the achievement gap.
Recently, Fossil Ridge was awarded a KISD Education Foundation Grant. The project titled, “Closing the Gap” was the collaborative brainchild of a handful of these leaders.
The goals of the project are:
- Close the gap in access to technology that exists in our student population, allowing for equity to digital tools and resources and extending the school day to a 24/7 model.
- Investigate the role that technology has on learning.
- Inform the long-range vision for technology integration and strategic plan for our campus.
I am pleased that the community and district leaders recognize the efforts and leadership capacity on our campus and am thankful for the present and future support we will receive as we work towards these goals.
As discussions took place regarding deployment of our project, which involves selecting twenty AVID students to receive Dell tablets and Verizon mi-fi cards for use at home and at school, we all agreed that in order to truly understand how technology impacts learning. We needed to form a leadership team, who would engage in a PLC that explores theory, methods, and tools for educational technology. It’s not enough to simply provide students with access to technology. Even the largest 1:1 programs in schools, without a professional development plan for teachers, will not produce the impact on learning that designers anticipate.
This team will visit schools in the Metroplex who have adopted some kind of technology model (1:1, BYOD, etc.) and observe how their deployment model impacts learning, what type of systems are in place to support student and teacher integration of technology, and measures that can capture the data we need to inform our vision. In addition to field trips, the team will also meet regularly to share resources, explore models, and create lessons that integrate tools. But, it all has to come back to the same point: How does technology impact student engagement and learning?
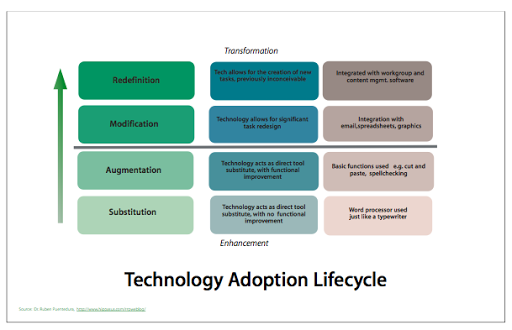
This past weekend I was explaining our project to another National Writing Project teacher consultant who is an instructional leader in a neighboring district that is exploring these same questions and working to support teachers as they grapple with technology that is integrated into instruction. She suggested that we start with the SAMR model developed by Dr Rueben Puentedura. Through this model, Dr. Puentedura demonstrates how our goal when considering a long-range technology adoption cycle on any scale, from district-level down to the classroom, should be to move from enhancement to transformation.

SAMR stands for substitution, augmentation, modification, and redefintion.Substitution: At this stage you are using technology as a direct substitution for another tool. Think using a word processor in lieu of a type writer without utilizing functions such as spell check, grammar check, etc. Dr. Puentedura argues that at this level, productivity actually decreases.
Augmentation: If we continue with our example of the word processor, then at this next level we would use its built-in features such as Spell Checker, word count, copy and paste, etc. Productivity or work flow might increase at this level, perhaps students can produce a finished draft more quickly using a word processor, but how has the tool transformed their thinking?
Notice the dotted line between the Augmentation and the next level in the model. This is meant as a target. When considering tools and tasks that integrate technology with learning, our goal should be to be above this line.
Modification: Again, if we consider the word processor as a tool, how could we modify the tool to allow for greater productivity? Rather than printing the file and sharing it, what if we integrated another tool such as email or drop boxes to publish and share? Or, what if we integrated a product or feature of another tool such as a chart from Excel, digital photos of artificats, etc. At this level, Dr. Puentedura claims, student learning begins to transform.
Redefinition: Here’s where my mind really starts to bend…In the redefinition level, technology allows us to do things otherwise impossible to create new products in new ways. Rather than a word processor where one student is authoring a product, what if students utilized Google Docs to collaborate in real time! This would not have been possible before. Students couldn’t work from their own houses from their own devices on a task at the same time. Now, technology allows for this level of collaboration and creation.
 |
| http://msdwc.edublogs.org/files/2010/04/itlog_techlifecycle1.png |
My colleague explained it to me much more simply…instead of old things in new ways, our goal is to shoot for new things in new ways.
I did some reflecting over some of the tools I’ve highlighted in the blog that meet this goal. Below you’ll find a list of tools and links to those blog posts that help us reach the Enhancement level of learning through technology.
Google Earth
My Big Campus
GoAnimate and Sock Puppets
Socrative
Glogster
VoiceThread
Prezi
I’m curious to hear your take-away after thinking about this model and how it applies to your decision making and lesson planning process. Limitations, drawbacks, confusions, applications? Leave your comment!
Adventures in iPads: Apps for Exploring
Tapping into the natural curiosities of our students with apps to explore information
The advent of mobile devices like iPads and smart phones have ushered in a new heightened era of information for our 21st Century students. With a swipe of a fingertip, endless amounts of information become available to us instantaneously as it streams 24/7 through our devices and into our lives . Access to information at this rate is a double-edged sword: At times a bombardment of messages, information can clutter our lives, leading to increased habits of multi-tasking, and letting go of a critical stance to information in favor of “more” stuff. On the other hand, we now have access to perspectives, events, societies, phenomena, and knowledge from around the globe. Such knowledge adds to our cultural and intellectual wealth when applied in creative ways.
For our students, Google is the main portal to the world of information. As a self-professed Google-lover, I understand the power of an advanced search engine. Do my students? Well…we’re working on that. Rather than sending students to “Google it,” I’d like to suggest a handful of apps designed for the iPad that foster academic exploration of topics, inquiries, and contexts appropriate for all content area learning. These apps utilize multiple modes of media to enhance and engage. Articles, videos, and resources are easily shared through the app feature, allowing for easy adaptation for BYOD projects where students may access the information from personal devices, including laptops, desktops, and mobile devices. I suggest utilizing these tools when introducing new topics or units to students. In a Flipped or VESTED classroom, these tools fit well into initial previewing and building background knowledge.
The following iTunes apps allow students the opportunity to explore a myriad of topics and content areas, engaging them through authentic connections to the world around them and utilizing mobile technology to access information in rapid time:
 iTunes U
According to Apple, iTunes U is the world’s largest collection of free educational content. Users can access courses from the world’s leading universities. In addition to participating in a course through readings downloaded into iBook, videos, assignments, and podcasts, students can also select from over 500,000 free lectures, videos, and podcasts. Teachers may utilize iTunes U as a tool to introduce a new concept or unit. For example, students may view a demonstration of a heat engine as an introduction to thermodynamics for an upcoming physics unit. Professor David Hoxley of La Trobe University has an entire classical physics course in iTunes U complete with video demonstrations and podcasts.
Other contributors to iTunes U include:
- Cambridge University
- Harvard University
- MIT
- Library of Congress
- Oxford University
- Stanford
- Yale
 Khan Academy
Khan Academy’s popularity is largely due to its simple, direct, and concrete illustrations of difficult subjects and complex concepts. Like iTunes U, students can subscribe to courses to continue their exploration into a specific discipline, topic, or skill.
 TED “Riveting talks by remarkable people, free to the world.”

Personalized Learning
These resources are valuable tools to provide students with opportunities to explore content related topics whether in a flipped, blended, or traditional classroom. Inviting them to explore these resources through their own curiosities supports their natural learning tendencies, allowing for a personalized learning experience. As online learning platforms continue to expand and evolve, soon, public education will need to consider how best to meet the needs of learners who can feasibly enroll him or herself in a free online course and master the content on their own through their own devices rather than the traditional educational setting. Public institutions have begun to integrate iTunes U courses into a traditional setting by creating unique courses for students to enroll in for a personalized experience.
But, it’s about baby steps and becoming comfortable with the sheer amount of information available, learning to control and manage the continual stream, and then become producers of solutions and innovations. iTunes U, Khan, and TED are leading facilitators of information collection and production.
Adventures in iPads: Initial Deployment Woes and the Sites that Saved My Sanity
The Adventure Begins…
 |
| 10 Biggest Questions about iPads in the Classroom |
[Enter site #1 that helped me wrap my brain about iPad deployment in schools]
http://www.scoop.it/t/ipadsineducation
A collection of deployment guides and resources for schools including a presentation on the role of iPads in schools, Apple’s VPP program, and integrating technology into instruction.
Initial roadblocks…
1) iPads are designed to be unique and personalized for their users–the functionality of the iPad (synchronized email, contacts, calendars, apps, iTunes, etc.) does not transfer to school models where iPads are used by multiple students.
 2) iPads are designed to be managed through a home computer, one at a time–Schools who purchased thirty or more iPads for classroom use struggled to painstakingly sync and manage each device, one at a time–a very lengthy and monotonous process (speaking from personal experience). Today, we have a MDM (multiple-device-manager) and a nifty little application that allows a school’s device manager (me) to upload content and manage multiple devices at one time–Apple Configurator.
 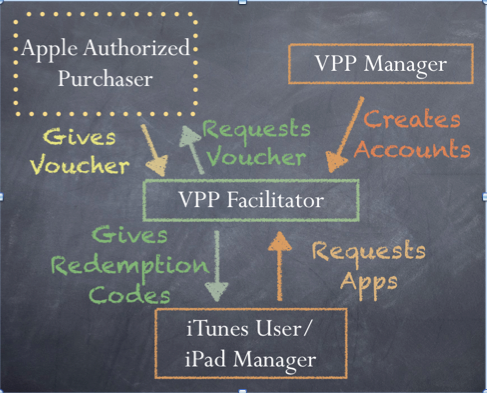 |
| http://wafflebytes.blogspot.com/2011/11/ipads-in-classroom-volume-purchase.html |
They are here!
Ummm…everything is plugged in, why aren’t the dang things charging?
 |
| PowerSync Cart |
The solution? Easy-peasy. Remove the bottom dividers, reach back, and jiggle the power cord to the cart, plug in the wall, flip the switch…and voila! We had power. This took about another hour of our time.
Two hours into our deployment day and we hadn’t even started the iTunes process.
It’s helpful when you have a working iTunes account.
How the heck do we get all of these tools to play nice?
While waiting to hear back about iTunes, we read and re-read, and read again the directions on using Apple Configurator and the Bretford PowerSync cart. [Enter website #1 that saved my sanity].
 Our iTunes delay did allow us to think about the profile we wanted to create for the devices. Apple Configurator not only allows you to upload and manage the content on the iPads, but it also allows you to enable and disable its features to create profiles. For example, the student profile we pushed out to all 30 iPads allows for use of Safari, the built in camera, and it is automatically connected to the Student wifi. Students cannot, however, change the wifi settings, delete or purchase apps, or access iCloud or photo stream. Nice!
While we are waiting…what ARE we going to put on these things?
Thank goodness for Mme. Morgan’s type A personality. The two of us split up and scoured blogs, Pinterest board, websites, and Twitter for lists of recommended apps for education.
[Enter in several more sites that helped us further explore iTunes and the world of apps]
http://appsineducation.blogspot.com/p/maths-ipad-apps.html
apps organized by content area
http://www.educatorstechnology.com/2012/06/blooms-taxonomy-for-ipad.html
apps organized by Bloom’s taxonomy
http://pinterest.com/gcisdtech/ipads/
Pinterest board for iPads in the classroom maintained by GCISD
Finally, let’s load these babies!
Final touches…
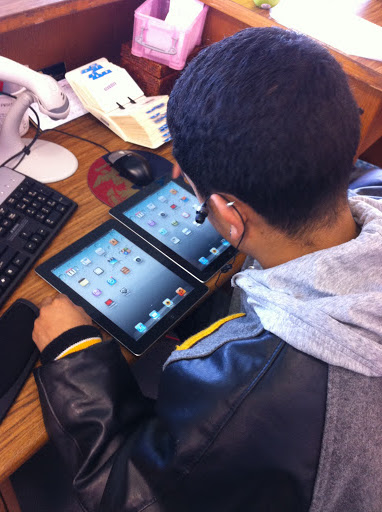 Our final step in preparing the devices for initial use involves manually organizing the apps by functionality and content onto screens so that they are classroom ready. This step must be done one-by-one…thank goodness for savvy student aides!
And the final product:
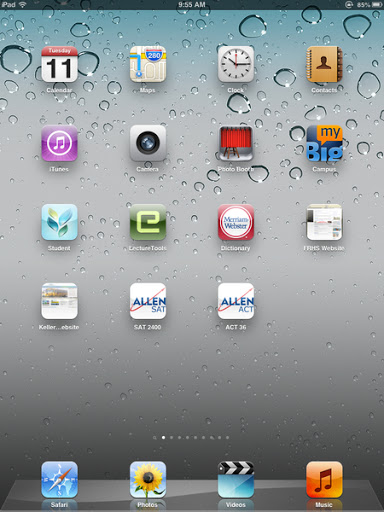 |
| Home Screen |
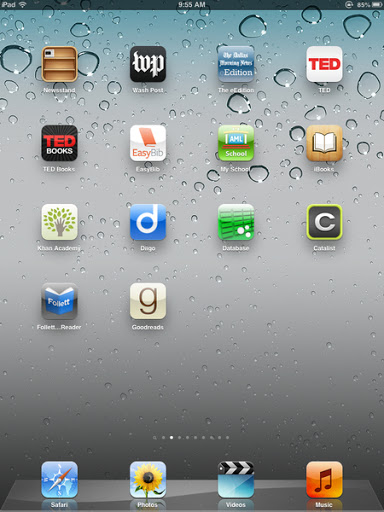 |
| Read and Explore |
 |
| Social Studies |
 |
|
Foreign Languages
|
 |
|
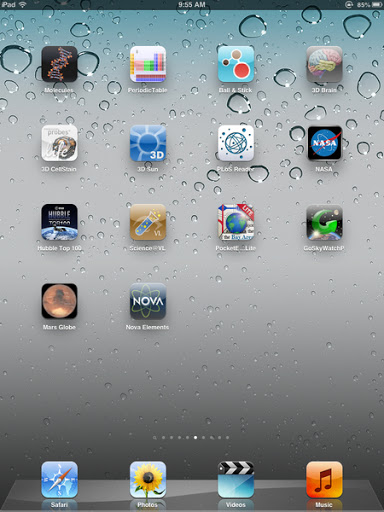
Science
|
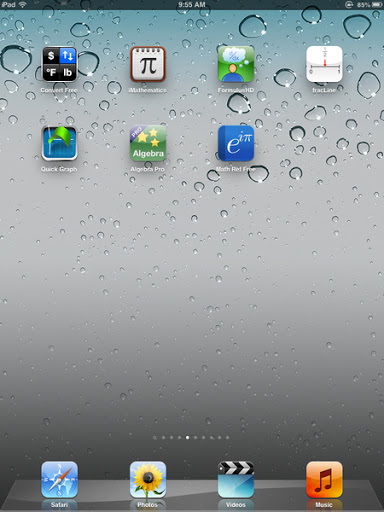 |
| Math |
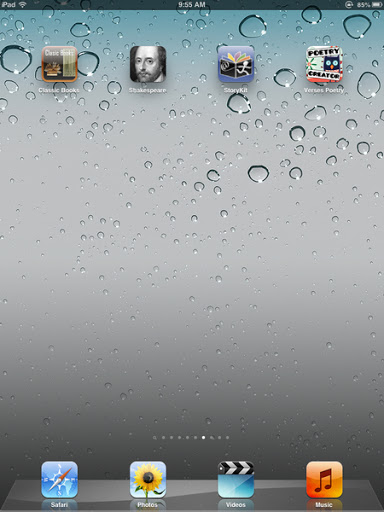 |
| Language Arts |
 Stay tuned for more adventures in iPads!

